
I’m excited to share how to set up your self-billing links!
If you open up Kartra and follow along, you should be able to implement it really quickly and have this up and running in a very short time.
This training will answer questions like:
-
“How does my client cancel their subscription?:
-
“How does my client request a refund?”
-
“How does my client update their credit card information?”
Let’s dive in!
In Kartra, You’re going to click to My Products > Products (at the top) > and then Self-Billing
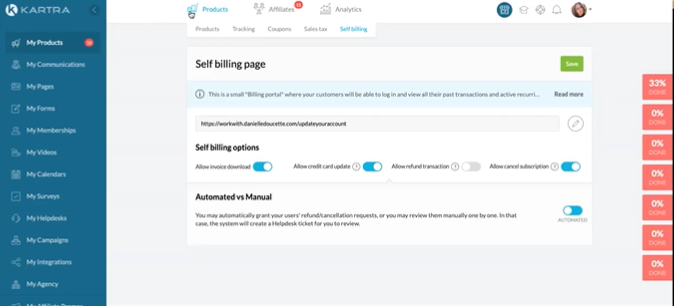
Notice the Kartra explanation that says:
“This is a small billing portal where your customers will be able to log in and view all of their past transactions, their active recurring subscriptions. They can download their invoices, update their credit card details, et cetera. They will be able to manage certain billing requests, such as to request refunds and to cancel active payment subscriptions, which in return might reduce the workload on your support team.”
We are going to talk about how you can actually set this up to be somewhat automated so that you do not actually even have to approve requests for things.
HOW TO SET UP
The first thing you’ll see here is this link:
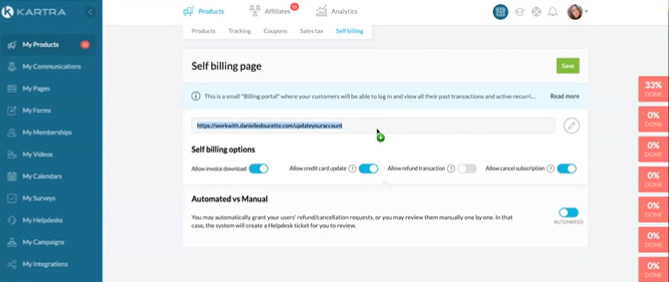
This link will be a default link. Like most other links inside of Kartra, we can edit this.
by clicking the pencil to edit the URL.
You’ll see that by default it will be your Kartra subdomain/self-billing. But if you have a custom domain integrated, you can go ahead and put that link on to that custom domain, and then you can name the URL with anything you want. In this example, I have named it:

Next up, let’s discuss the self-billing options:
SELF-BILLING OPTIONS
-
Allow invoice download.
This one is good and can be helpful around tax time. If you have this enabled, clients will be able to download their invoices for their expenses. This will help save you from having to go in and do it for your client.
-
Allow credit card updates.
This is going to reduce the risk of rebill failures by allowing your customers to update their credit cards. It can also keep you from having to get on the phone, get their details, and do it for them. It is also a little more secure on their end.
-
Allow Refund Transaction.
This is going to be something that you can automate.
This is how…
When we set up our products, there is a section for your refund policy. You have choices of no refund; 7 days, 14 days, 30 days, or 60 days. When you select one of those and you have your billing set up to automate allow refunds, Kartra is actually smart enough to know that if someone requests a refund within that time period, it will automatically grant that refund.
If they request a refund outside of that time period, Kartra will deny that refund because it’s outside of your refund policy.
-
Allow Cancel Subscription.
Your customers will see their active recurring payments subscriptions, and they’ll be able to cancel them at any time.
If you have this set automated, then when they request cancellation or request a refund, it will be automatically taken care of. If you set this in the manual, then you will get a notice that they’ve made a request and then you can go in and take care of things from there.
Once you set up all these options, click on save and you’re all set.
Now, Let’s take a look at what Your Self-Billing page looks like…
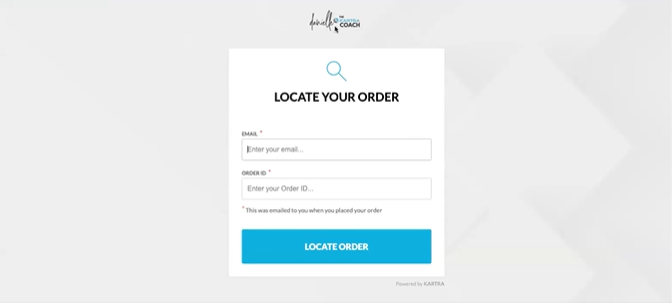
You’ll see that it has a logo at the top. This logo is pulled from the logo that is in your profile. This is a page we can not edit so we need to make sure that we have our logo set up in that area.
In order to locate the order. These are the two things that your client needs in order to be able to log in to self-billing.
-
Email Address
-
Order ID
Where to get the order id? When somebody makes a purchase through Kartra, they receive an email receipt that has their order ID in it.
Sometimes, though, it may be a little difficult for your clients to find it, so you can find that for them by going to My Products>Analytics>Transactions.

This is where you can search through your transactions.
You can click on the magnifying glass to search, and you can switch the filter from order ID to Buyer Name so that you can search for them by name.
You can also get to this transaction page via Communications > Leads.
You can search for their name inside of leads and go to transactions. When you click on transactions, you will see all of the purchases made by your client.
These are two different ways you can get someone’s order ID number from Transactions in Analytics or from Leads in My Communication.
Once you have both the information, the email address and order id, you are now ready to log in.
So in this example, I pulled up one of my test purchases so that I can show you what it looks like from your client’s side of things when they log in.
These are my orders here.
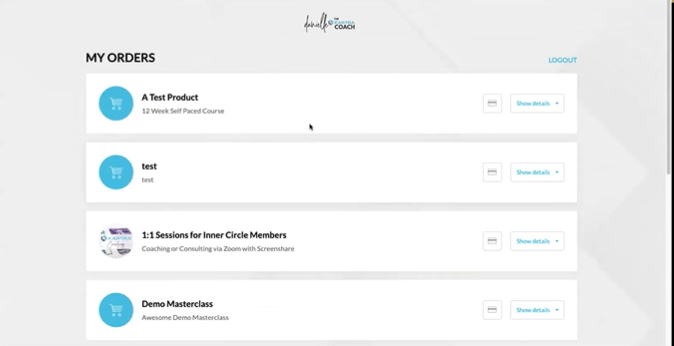
You’ll see that I have done a lot of testing on this account with a Stripe API Test key.
Now this is how it looks if your client has an active monthly payment.
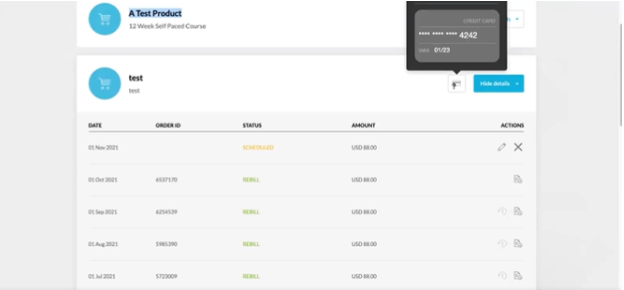
(Note: Please note that this is an ongoing subscription that I have to my test product with a test key through Stripe. So, this is not actually my credit card and I’m not actually being charged $88 every month. I did use a test integration and I will explain to you how that works, shortly.)
As you can see, this page tells your client when their next scheduled payment is coming up.
Here are some of the actions that can be done on this page:
-
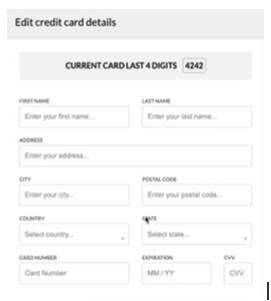
Change Credit Card.
The system shows the last four digits of the credit card to remind you what card has been used.
To change credit card details, you can click on the pencil icon. The credit card can be updated with a brand new card, or you can just update the expiration date and put the card numbers back on again.
2. Download the invoice with this download invoice selection.
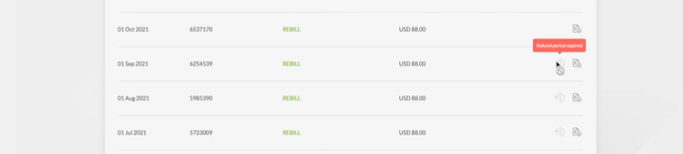
3. Ability to request a refund.
This example shows that the refund period has expired for those older charges. This would like it if you did allow for refunds and it was still inside the refund time limit.
It will show if a product is no longer able to be refunded as well.
Additional Note: I do suggest that if someone is reaching out to you asking about how you request a refund, you just go in and refund them, and this is how you can do that for them:
If you click on the order ID, you’ll see this transaction window pops up.
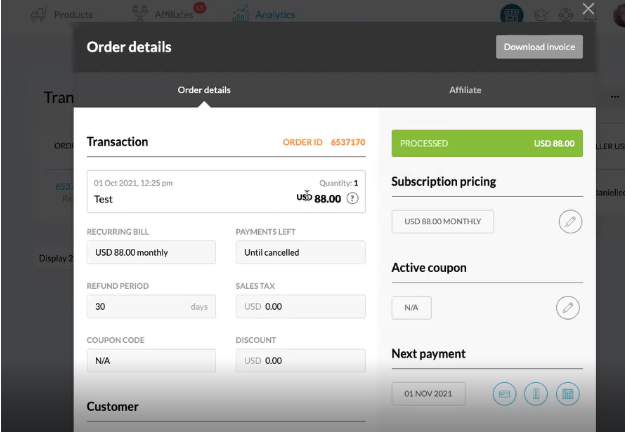
And Here are some options that we can do
-
update their credit card info for them. (I don’t recommend this, but this is where you would do that, if you want to).
-
pause recurring payments: This is if you want to pause it without canceling their subscription, without revoking their access.
-
reschedule their next payment date. Let’s say that you wanted to give them a month free. You can do that. If you want to reschedule everybody, everyone’s charge gets put on the 1st. You can do that.
billing actions such as:
-
cancel future recurring payments
-
issue a full refund.
-
issue a partial refund.
Note: For partial refund: “While you may apply as many partial refunds for a transaction as you wish. Keep in mind that all transactions in Kartra must be at least $1. That means that if you apply for a partial refund and the transaction’s remaining balance falls under $1, the system will instead apply for a full refund for that value. In short, make sure that the partial refund amount is less than or equal to the transaction balance minus $1.”
Another thing to keep in mind is a partial refund or a full refund is applicable for the amount of this bill only. If you have a product for which they pay $100 for five months and you issue a full refund for this $100 charge, they will be refunded the $100. A full refund does not apply for anything that has been paid previously.
-
Do a chargeback. A chargeback is when a client goes to their credit card and says, “This is a fraudulent purchase” or “I don’t recognize this purchase,” Basically, inside of Kartra, the only thing we would need to do here is to mark it as a chargeback.
STRIPE INTEGRATIONS FOR THE TEST PURCHASE
This is something that you can do, if you want to test a funnel that has an original purchase, a bump offer, and a one-click upsell, and you’d like to test how the whole process works. You actually want to test it as if you were making the purchase.
Some people will change the price down to a dollar and they’ll use their own credit card. You can do that, if you’d like. Some people will use their own credit card and then issue themselves a refund. Some people will use their own credit card and, obviously, their money gets deposited back into their bank account after they make the purchase. They’re just out the Stripe payment fees, which is fine too.
If you do want to set up a test integration, you have to go into your integration.
Here, it shows that I have two Stripe integrations.
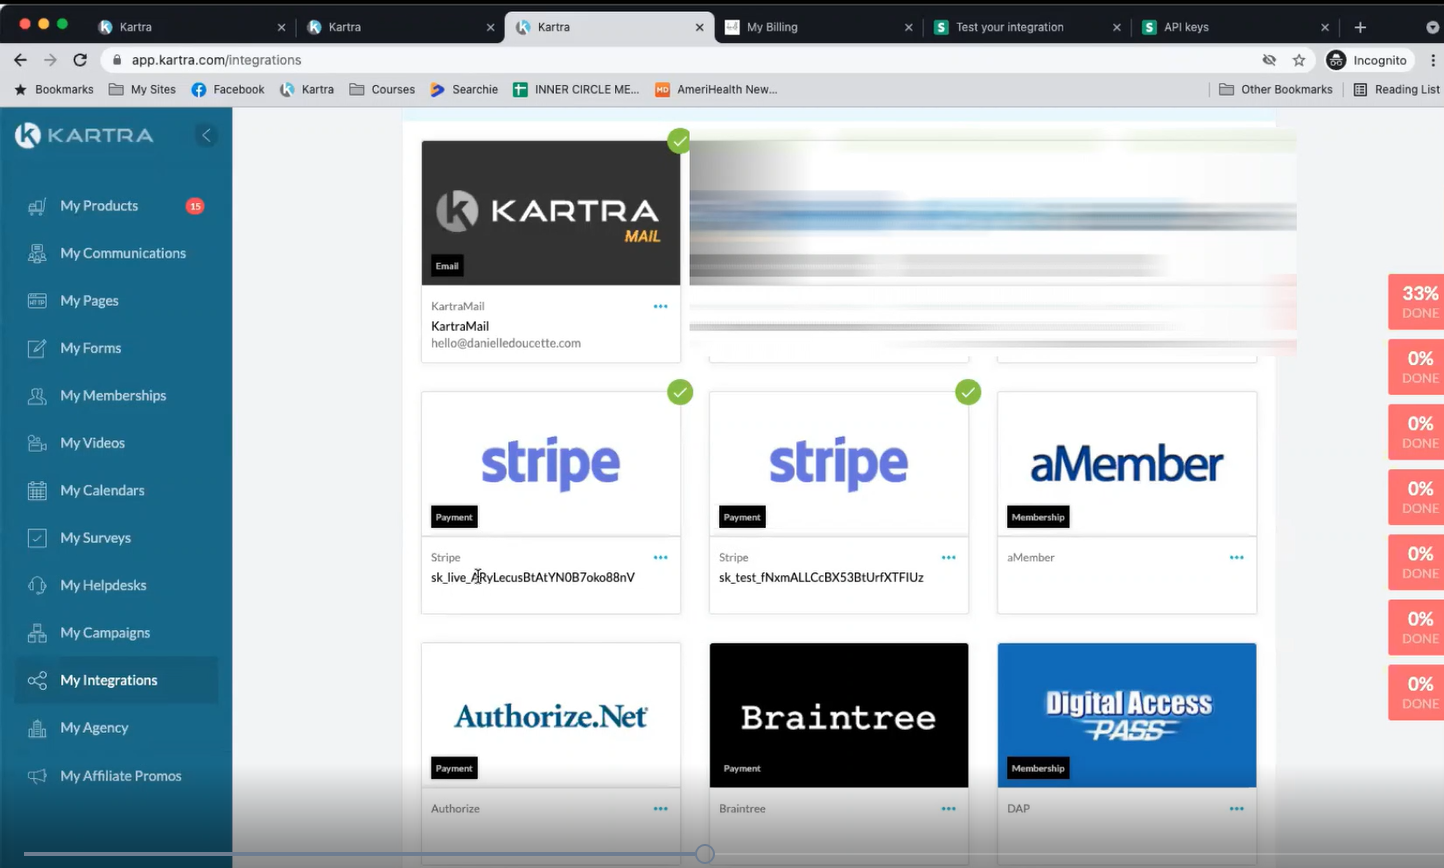
I have one called SK live and one called SK test. When I want to make a test purchase, I actually switch the payment gateway from the live key to the test key, and then I am able to make a purchase.
Where do you get your test key inside of Stripe? It’s going to be in the same place in your dashboard when you go to your API keys. It’s going to be PK test and SK test.
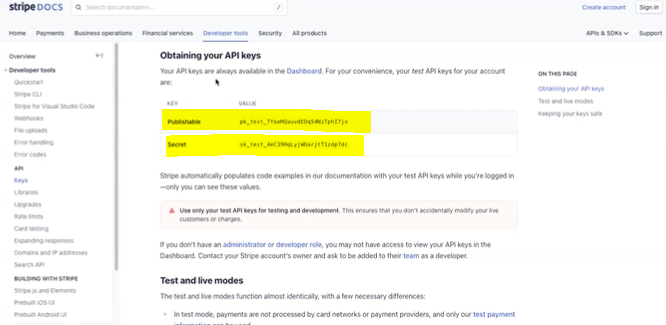
You’re going to just set up the integration the exact same way that you did your live integration. But instead of the live key, you will use your test keys.
And when you’re checking out to test your integration, you use the default
No Authentication US card that has the card number: 4242 4242 4242 4242.
You can then add in any date in the future, as the expiration date. And you can put in any 3-number combination, as the three digit ‘fake’ security code.
WHERE TO USE YOUR SELF-BILLING LINK
Now that you have your self-billing link, where do you use it?
1. EMAILS
Another place where you can pop this in that’s helpful is if you go to your email notifications (which are under your profile in the top right, and to your leads area).
There are three options for reminders: one-day pre-bill notification, three-day pre-bill notification & your seven-day pre-bill notification.
You can add your self-billing link to these notification emails.
In this example, you’ll see that I have it here: “Update your account.”
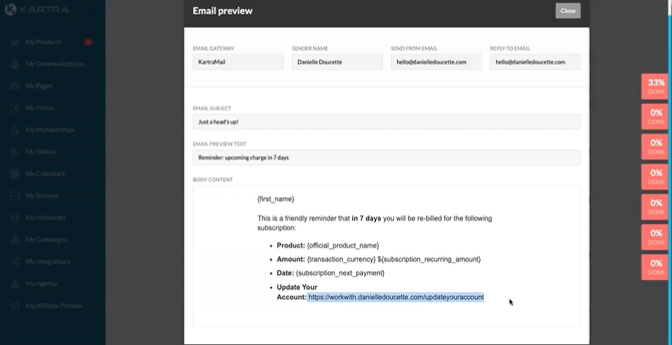
I’m reminding my clients that the membership is going to charge again in seven days. If they need to update their credit card, or if they want to cancel before that seven days is up, then they can use the Self-Billing link.
Another thing that you can do is the rebill failure or alert the buyer. So this email is going to be the one that says, “Something happened and your billing didn’t go through.”
What can you do here? You can have a message that says “Something happened and your billing didn’t go through. if you paid via credit card, you need to make sure that your card didn’t expire. If you need to change your card, please click here.” That link is going to the self-billing.
2. YOUR MEMBERSHIP
You can put it into the membership itself in some area where you are, you have something that says, “Need to update your credit card information? Do that here.”
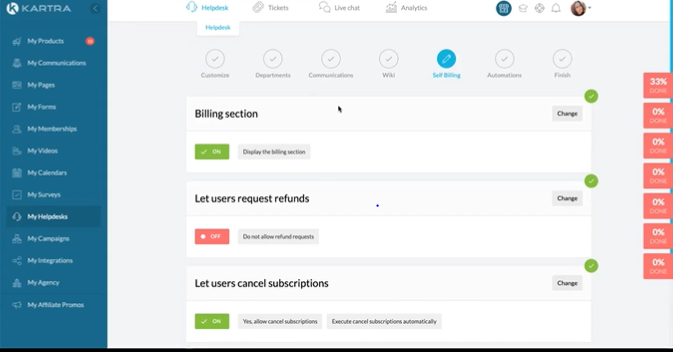
3. YOUR HELP DESK
The other place where you can integrate your self-billing settings is actually inside of your Help Desk, if you have one set up.
Here is an example:
WRAP-UP
We did this in a short amount of time, and if you followed along and took action, you now have your link to your own self-billing page!
You can add this wherever you’d like to share this with your clients, or you can have this link on hand so that if someone asks you, you know where to send them, what information they need, what the page looks like when they log in, what they’re able to do, and also what you’re able to do on your end!